
Introduction:
In the pursuit of a greener and sustainable future, solar energy has emerged as a beacon of hope. Installing solar panels not only reduces dependency on conventional energy sources but also contributes to a cleaner and more sustainable environment. If you’re considering embracing solar power and want to understand the nitty-gritty of the installation process, you’re in the right place. This comprehensive guide will walk you through the steps of a professional solar installation, ensuring a seamless transition to clean energy.
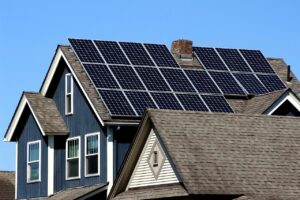
Step 1: Site Assessment and Planning
Before diving into the installation process, a thorough site assessment is crucial. Evaluate the following factors:
Solar Potential: Assess the solar potential of your location by considering factors such as sunlight exposure, shading, and local climate conditions.
Roof Suitability: Ensure that your roof is structurally sound and suitable for solar panel installation. Evaluate the roof’s orientation, tilt, and available space.
Energy Consumption Analysis: Examine your historical energy consumption patterns to determine the appropriate size of the solar system needed to meet your energy needs.
Step 2: Designing the Solar System
Collaborate with a professional solar designer to create a customized solar system based on your site assessment. Consider the following aspects:
Solar Panel Selection: Choose high-quality solar panels with the right wattage and efficiency to maximize energy production.
Inverter Selection: Select an inverter that complements your solar panels to convert direct current (DC) generated by the panels into usable alternating current (AC).
Mounting System: Choose an appropriate mounting system based on your roof type to securely attach the solar panels.
Electrical Wiring: Plan the electrical wiring layout, ensuring compliance with local electrical codes.
Step 3: Obtaining Permits and Approvals
Navigate through the bureaucratic landscape by obtaining the necessary permits and approvals:
Local Permits: Acquire permits from your local municipality or relevant authorities to ensure compliance with building codes and regulations.
Utility Approval: Coordinate with your utility company to gain approval for grid connection and net metering arrangements.
Step 4: Solar Panel Installation
Once the paperwork is in order, it’s time for the hands-on part of the installation:
Roof Preparation: Ensure the roof is clean, and any necessary repairs are completed before installation.
Mounting Installation: Install racking or mounting systems on the roof, ensuring proper alignment and securing them in place.
Solar Panel Placement: Carefully place and secure solar panels on the mounting system, following the layout designed in the planning phase.
Electrical Wiring: Connect the solar panels using the designed electrical wiring system, ensuring proper grounding and adherence to safety standards.
Step 5: Inverter and Electrical Components Installation
Focus on the heart of your solar system – the inverter and associated electrical components:
Inverter Installation: Mount the inverter in a well-ventilated area, connecting it to the solar panels and the electrical panel.
Electrical Panel Integration: Integrate the solar system with your electrical panel, ensuring seamless connectivity to your home’s electrical system.
Step 6: System Testing and Commissioning
Before celebrating your newfound solar power, conduct thorough testing to ensure optimal performance:
System Checks: Verify all electrical connections, conduct insulation tests, and ensure there are no loose connections.
Inverter Configuration: Configure the inverter settings to match the specifications of your solar panels and ensure efficient energy conversion.
Performance Testing: Run performance tests to measure the solar system’s output under different conditions and ensure it meets expected levels.
Step 7: System Monitoring and Maintenance
Once your solar systems are up and running, implement a robust monitoring and maintenance plan:
Monitoring Tools: Invest in monitoring tools to track your system’s performance regularly and identify any issues promptly.
Regular Maintenance: Schedule routine maintenance, including cleaning the solar panels, checking electrical connections, and ensuring optimal system performance.
Step 8: Ensuring Safety Measures
Safety is paramount in any solar installation project. Follow these crucial safety measures:
Personal Protective Equipment (PPE): Equip installers with appropriate PPE, including gloves, safety glasses, and harnesses when working at heights.
Electrical Safety: Adhere to electrical safety protocols to prevent accidents. Ensure that all personnel are well-trained in handling electrical components.
Roof Safety: Implement safety measures on the roof, such as installing guardrails or using safety nets to prevent falls. Provide adequate training for working at heights.
Step 9: Final Inspections and Quality Assurance
Before commissioning your solar system, conduct final inspections to ensure everything is in order:
Visual Inspections: Perform a comprehensive visual inspection of the entire system, checking for any signs of damage, loose connections, or irregularities.
Quality Assurance Checks: Verify that all components meet quality standards and that the installation adheres to industry best practices.
Regulatory Compliance: Ensure that the installation complies with local building codes, electrical regulations, and any other relevant standards.
Step 10: Documentation and Handover
Complete the solar installation process by organizing and documenting all relevant information:
As-Built Documentation: Create comprehensive as-built documentation that reflects the final installed configuration, including drawings, schematics, and specifications.
User Manuals: Provide user manuals for the solar system, detailing its operation, maintenance requirements, and any safety considerations.
Final Commissioning: Conduct a final commissioning of the solar system, officially transitioning it to its operational state.
Step 11: Post-Installation Support and Customer Education
Support your clients even after the installation is complete:
Customer Education: Educate the end-users on the operation and maintenance of the solar system. Provide guidance on monitoring tools and reporting procedures.
Post-Installation Support: Offer ongoing support for any questions or issues that may arise. Establish a clear channel for communication and prompt resolution of concerns.
Step 12: Leveraging Smart Technologies for Monitoring
Take your solar installation to the next level by incorporating smart technologies for efficient monitoring and management:
IoT Sensors: Integrate IoT sensors into your solar system to monitor performance metrics in real-time. These sensors can provide data on energy production, system efficiency, and potential issues.
Cloud-Based Monitoring Platforms: Utilize cloud-based platforms to collect and analyze data from your solar installation. These platforms offer remote monitoring, allowing you to track performance from anywhere with an internet connection.
Data Analytics: Implement data analytics tools to derive actionable insights from the wealth of data generated by your solar system. Analyzing trends and patterns can help optimize performance and identify areas for improvement.
Step 13: Exploring Energy Storage Solutions
Consider integrating energy storage solutions to enhance the efficiency and reliability of your solar installation:
Battery Storage: Install batteries to store excess solar energy generated during the day for use during periods of low sunlight. This enhances energy independence and provides backup power during grid outages.
Hybrid Systems: Explore hybrid solar systems that combine solar panels with other renewable energy sources, such as wind or hydro power, for a more robust and reliable energy supply.
Step 14: Community Engagement and Advocacy
Extend the impact of your solar installation beyond your property by engaging with the community:
Educational Workshops: Host workshops and seminars to educate the local community about the benefits of solar energy. Share your installation experience and encourage others to embrace clean energy.
Community Solar Initiatives: Explore community solar programs where multiple households can benefit from a shared solar installation. This approach promotes sustainability on a broader scale.
Step 15: Continuous Optimization and Upgrades
Commit to the long-term success of your solar installation through continuous optimization and periodic upgrades:
Performance Monitoring: Continuously monitor the performance of your solar system and address any deviations from expected output promptly.
Technology Upgrades: Stay abreast of technological advancements in solar energy. Consider upgrading components or incorporating new technologies to enhance efficiency and reliability.
Energy Efficiency Measures: Implement energy efficiency measures in conjunction with your solar installation. This may include upgrading appliances, improving insulation, or adopting smart home technologies to maximize energy savings.
Conclusion: Sustaining a Solar-Powered Future
By embracing these additional steps, you elevate your solar installation from a simple energy-generation system to a sophisticated, smart, and community-driven initiative. As your solar panels convert sunlight into electricity, the ripple effects extend beyond your property lines, contributing to a more resilient and sustainable future. Through continuous innovation, community engagement, and a commitment to excellence, your solar installation becomes a beacon of inspiration for others looking to embark on their own journey toward clean energy. Hope your solar-powered legacy shine brightly for generations to come.
Passionate about making Sustainable Green Energy Solutions
Join us